October 23rd, 2017 — Designer Stuff
9 days until Halloween Countdown ~
There are many different ideas of where the very exciting and often spooky holiday that is halloween originated from. Growing up, I didn’t really think of why Halloween existed, all I knew was I wanted to plan my costume a month in advance, find out what parties were happening and be prepared to stuff myself silly with candy that night.

Halloween has a richer meaning than I previously recognized. For one thing, Halloween goes by a few different names. Some call it “Samhain,” others call it “All Hallows Eve,” it can also be referred to as the “Festival of the Dead” and “All Souls Day” throughout differing cultures and traditions.

“Samhain” pronounced saw-win, in gaelic means “summers end” and is in observance of the sunset from october 31st until the morning of november 1st. This was an ancient celtic practice marking the halfway point between the autumn equinox and the winter solstice. This was a celebration of and important glance into the darker side of things.
“All Hallows Eve, “Halloween” or “All Saints Eve” is a part of the western christian observance of the feast of All Hallows Day” which marked a 3 day time of remembrance of martyrs, saints and those departed.

“Festival of the Dead,” “All Souls Day,” and “Ghost Festival” is celebrated throughout many different cultures spanning South America and Asia. In Taoist and Buddhist traditions, the dates and times of this can fluctuate because it follows a different calendar. This was a time to honor and pay respect to ancestors.

It is said that during this period the veil between the two worlds, those of the living and those of the dead is at its thinnest. Thus , it is easier to observe, connect and make contact with spirits and ancestors.
Although they go by several different names and have slight variations in their reasons for the observance and festivities, a common theme strings throughout each of them.
There is a cycle to this journey. From sunset into sunrise, from summer into winter, from dark into light, from death into rebirth – these seemingly two opposing forces are happening simultaneously.

Meaning, whether we are dressing up to ward off evil spirits, feasting on sweet delicacies in joyous remembrance of those departed, lighting jack o lanterns to mimic the sun holding off the darkness for a little longer or simply realizing somethings aren’t always what they seem… we can gain a deeper insight behind the mysterious night of Halloween which is celebrated throughout our world.
View post: sixdifferentways.com
Tags: Modern Furniture
October 21st, 2017 — Designer Stuff
12 days until Halloween countdown!
When I was a child my mom came up with such a cute concept for a combined halloween costume.
She dressed up as a witch and I was her little spider. She made a little web attached to her dress so she could keep me close while trick or treating. Not only was this idea adorable but it served as a smart way to keep us together while we went from door to door. Years later I saw pictures and I thought I’d share a few ideas to get your creative juices flowing!

source: bored panda
Tags: Furniture
October 18th, 2017 — Designer Stuff
14 Days Until Halloween!
Booze Apple Bobbing is a classic game with a fun adult twist to the mix! If you are throwing a halloween party this one is fun to make and there is a good chance more guests will want to participate in the festivities.
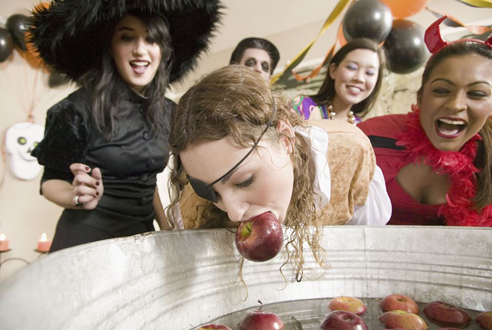
The classic game consists of a large bucket filled with water with about a dozen apples, sometimes more, sometimes less, floating around. The idea is each person takes a turn only using their mouths to grab as many apples with their teeth and pull it from the bucket. They are usually given a set amount of time and whoever gets the most apples wins a prize.
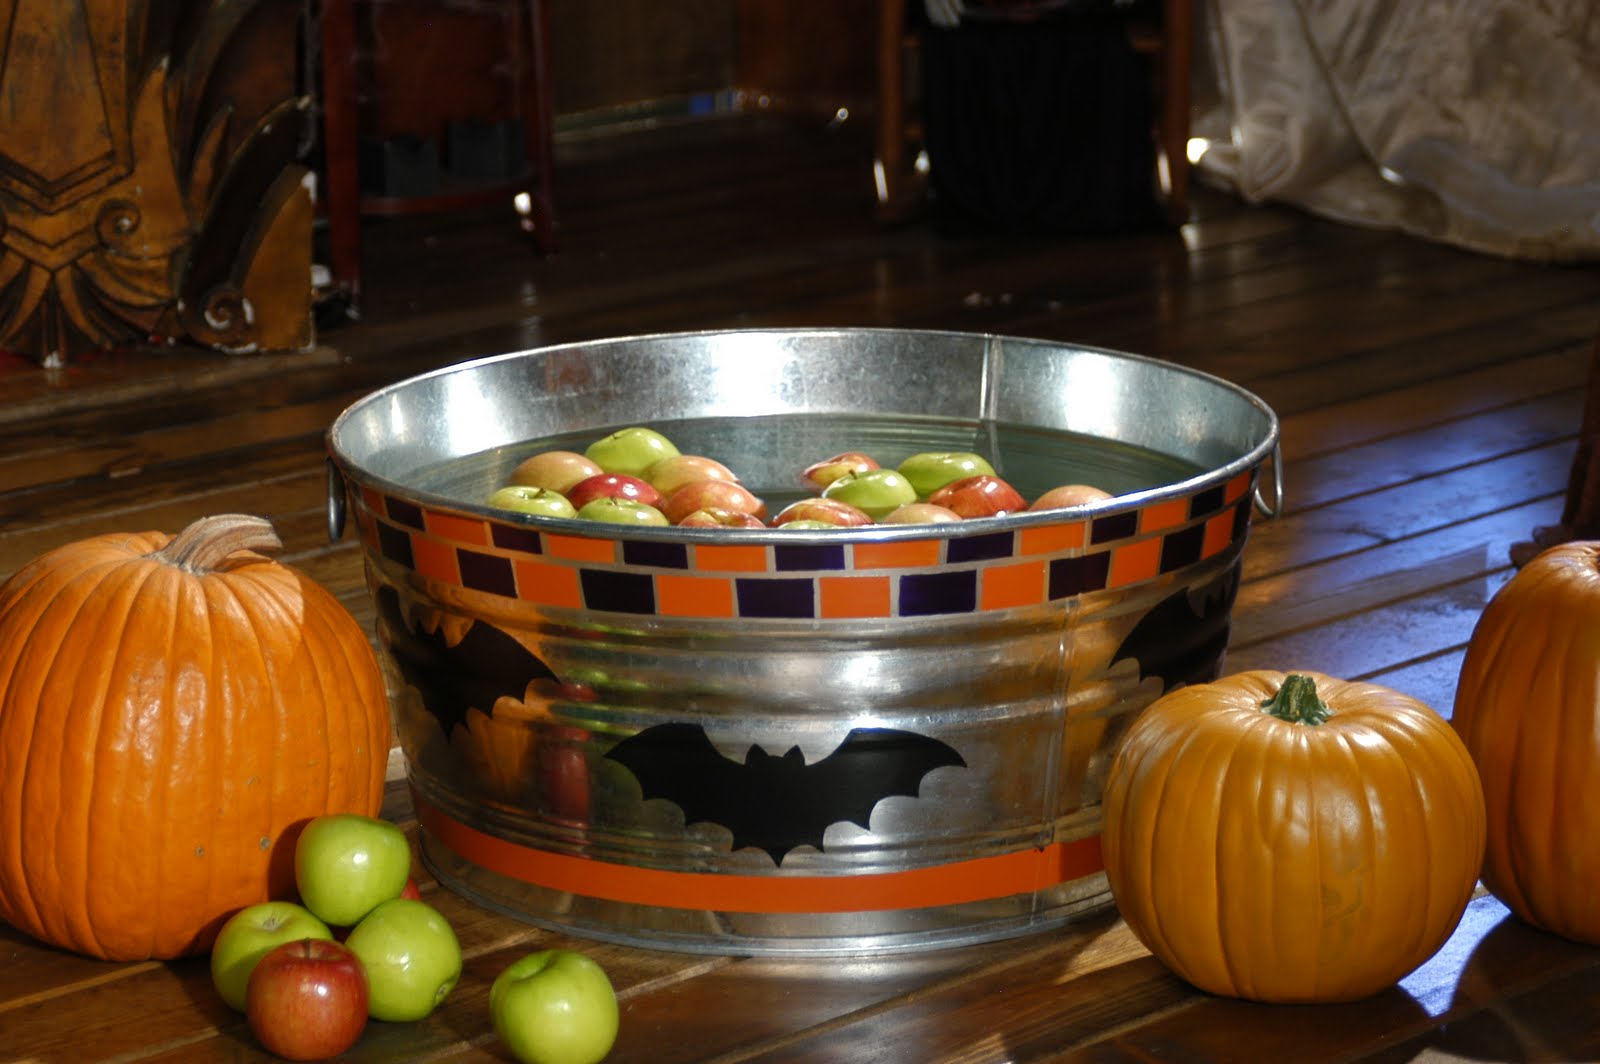
Booze Apple Cider bobbing follows the same set of rules only with one variation – the apples were soaking in a hard alcohol for a week or so ahead of time. The concept is similar to rum and vodka soaked gummy bears.
Grab a 1 – 2 dozen whole apples. Combine apple cider, apple juice, white or brown sugar and cinnamon sticks in a large pot and bring to a boil. Allow to cool. Add a 190 proof moonshine or grain alcohol to the mix.
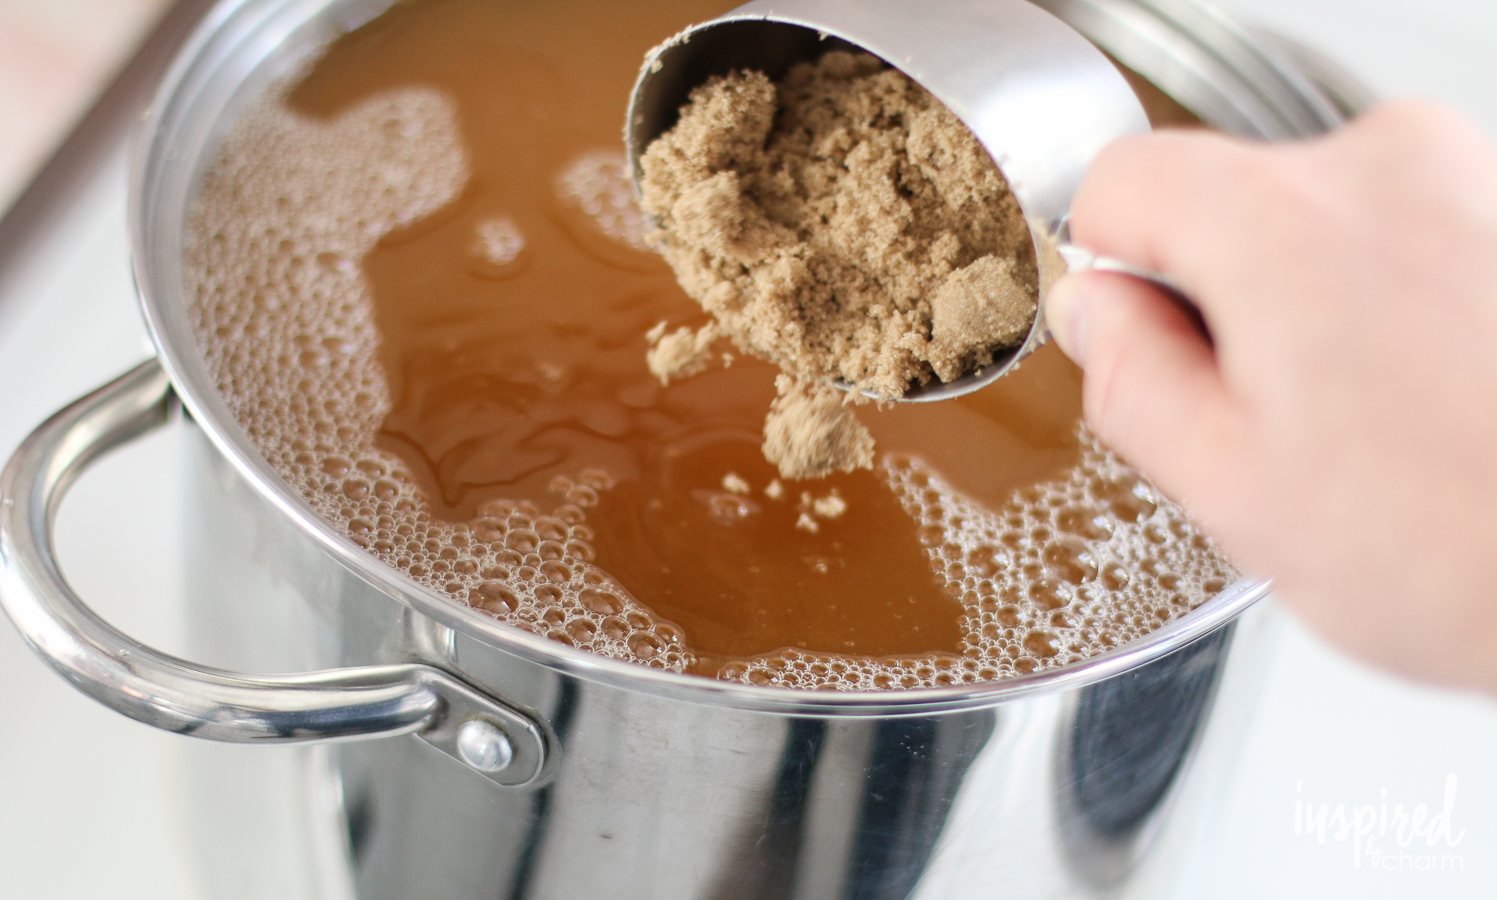
Then add your apples and tightly seal. If you don’t want to get too fancy with it, you can grab a caramel vodka and combine your apples with that.
A week or more is ideal. You can use a giant mason jar or even a large cooler to keep your concoction until ready for use.
Use the apple moonshine the apples were soaking in as a beverage to serve at the party.

The bonus of this version – you probably won’t need any prizes since the apples spread enough cheer to go around!
Original post: sixdifferentways.com
October 17th, 2017 — Designer Stuff
I will be doing 3 blogs a week leading up to the king of spooky holidays – Halloween! Each blog will incorporate some spooky recipe, fun party idea or halloween centered theme! Halloween is one of my favorite holidays from the costumes and candy to the haunted houses and spooky hayrides – it is fun, festive and gives everyone a chance to show another side!
Today is Day 16~ Let the countdown begin!
If you are thinking of throwing a halloween bash this year or if you want to bring a fun and creepy dish to someone else’s halloween party, here is one of my all-time favorite halloween party treat ideas that is sure to thrill your guests!

Decapitated Barbie (and Ken) Body Part Jello – Barbies can be a little creepy in general, proportionally speaking that is, especially those new Brat Dollz i’ve seen over the last couple of years – this unique dish will definitely have guests rethinking one of their favorite childhood toys.
The easiest barbies to use are the ones from the dollar store that have hollow body parts. The rubber dolls can be expensive and are difficult to slice up.
Grab a few of those depending on the amount of guests you’ll be serving. I like to use both male and female dolls to keep things neutral!
Slice up your barbies into parts, don’t make the parts too small because you want your guests to be able to see them when eating so they don’t accidentally eat the part! I would not recommend serving this dish to children under the age of 12 or without adult supervision. Be sure to let guests know the body parts are not edible.
I like to chop the hair up on the dolls heads, this gives it a scarier look and this is also to avoid any long stray hairs floating around in your jello mold.

Next you’ll want to make your jello. Follow the instructions on the package.

You’ll want the jello liquid to solidify a little bit before sticking the body parts in it otherwise the body parts will just float together.
Place the jello in the fridge for a little while – checking periodically to see its consistency. The consistency should be firm enough to keep your creepy parts from floating around aimlessly but soft enough to be able to place them in it.
Another trick is to make individual cups of jello and place one or two body parts in each. This prevents the body parts from floating around and mixing altogether.

Plant your body parts throughout the mold, you can make it look like a bloody massacre especially if you use red jello, meaning the jello mold can look all mashed up or you can choose to gently press down, using a wooden chopstick to push them deep down into the mold.
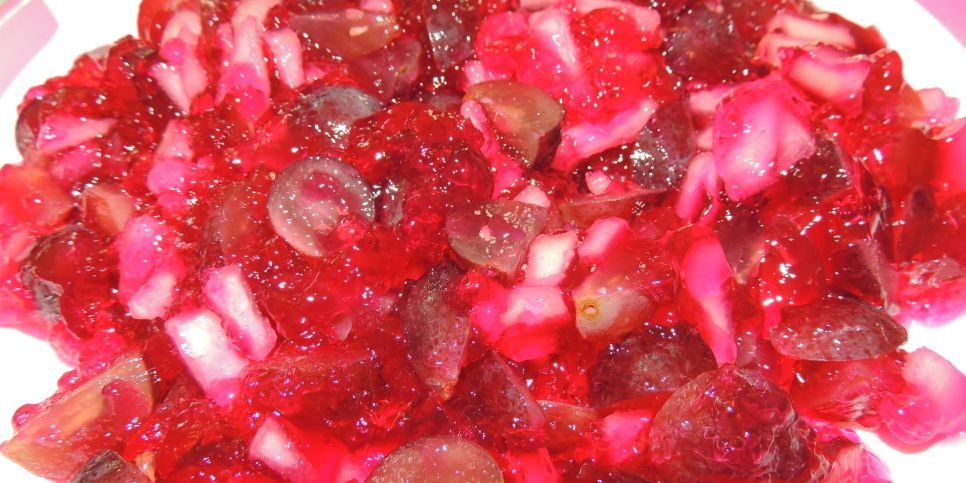
Decapitated Barbie Body Part Jello – a particularly frightening party treat for your halloween spectacular!
Tags: Furniture
October 3rd, 2017 — Designer Stuff
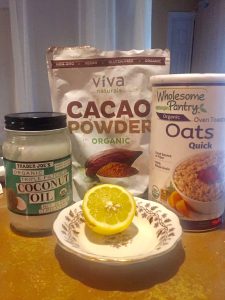
Master Skin Mask Ingredients
Since about my early twenties I’ve had worse breakouts and acne prone skin then while in my teen years. I’ve been to dermatologists, doctors, have taken medication and nothing has worked quite like this natural mask I’ve created using an assortment of home remedies!
This mask helps exfoliate, moisturize and tightens pores while unclogging them.
I call it the Master Skin Mask and it’s a combo of treatments in one.
Tags: Modern Furniture
September 29th, 2017 — Designer Stuff
Before electricity and oil burning, candles were the best way to light the home. In the middle ages, only the wealthy class and institutions such as churches and temples had access to beeswax candles. Today it is easier to acquire beeswax and it is proven to be one of the best waxes to use for candle making as it is one of the slowest burning and it purifies the air. Beeswax is also the best wax to use when adding essential oils for aromatherapy for candle-making.
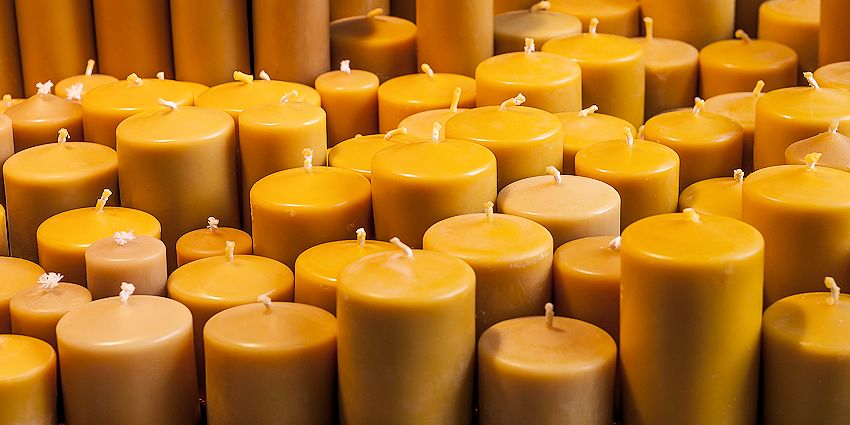
Beeswax Candles | Source: Bee Wilde
Here is what you’ll need:
- Preferred essential oil (s) – see below for list
- 1 lb pure filtered beeswax
- 1/2 cup coconut oil
- 3 half-pint canning jars
- 60 ply cotton braided wick #4 cut into 6 inch pieces
- An empty coffee can or metal pitcher
- double boiler or a pot large enough to fit your pitcher to use as a double boiler
- bamboo skewers
The only setback to beeswax is the wax can become very sticky wax when using molds. It is still totally worth it.
Disclaimer: Beeswax is flammable, keep a close eye on it when it is heating. Don’t forget about it while its cooking or it might get too hot and spill all over your stove!

Beeswax Bars | Source: eBay
First, place your beeswax in your metal pitcher or coffee can. Place the pitcher in the pot or double boiler and fill it with enough water to surround the pitcher without spilling into the pitcher. Turn the stove to a medium-high heat. As the water heats, it will boil so make sure you don’t feel it too high for when it starts bubbling.
As the wax melts, prepare your wicks and cut them into 4 pieces about 6 inches long. You may even be able to purchase them at this size already.
Once the water is brought to a boil, turn the heat down to a gentle simmering boil until all the wax has melted.
Remove the pitcher from the heat once the wax is melted. Add your coconut oil to the mixture. Take your bamboo skewer and stir the wax-oil combo gently.
Add drops of your preferred essential oil to the mixture (depending on the size of the batch). I use about 10 – 15 drops for 5 jars. Do research on the best scents for candles and aromatherapy. Below is a list to help you! Gently use your skewer to mix the wax, coconut oil and essential oil blend together.
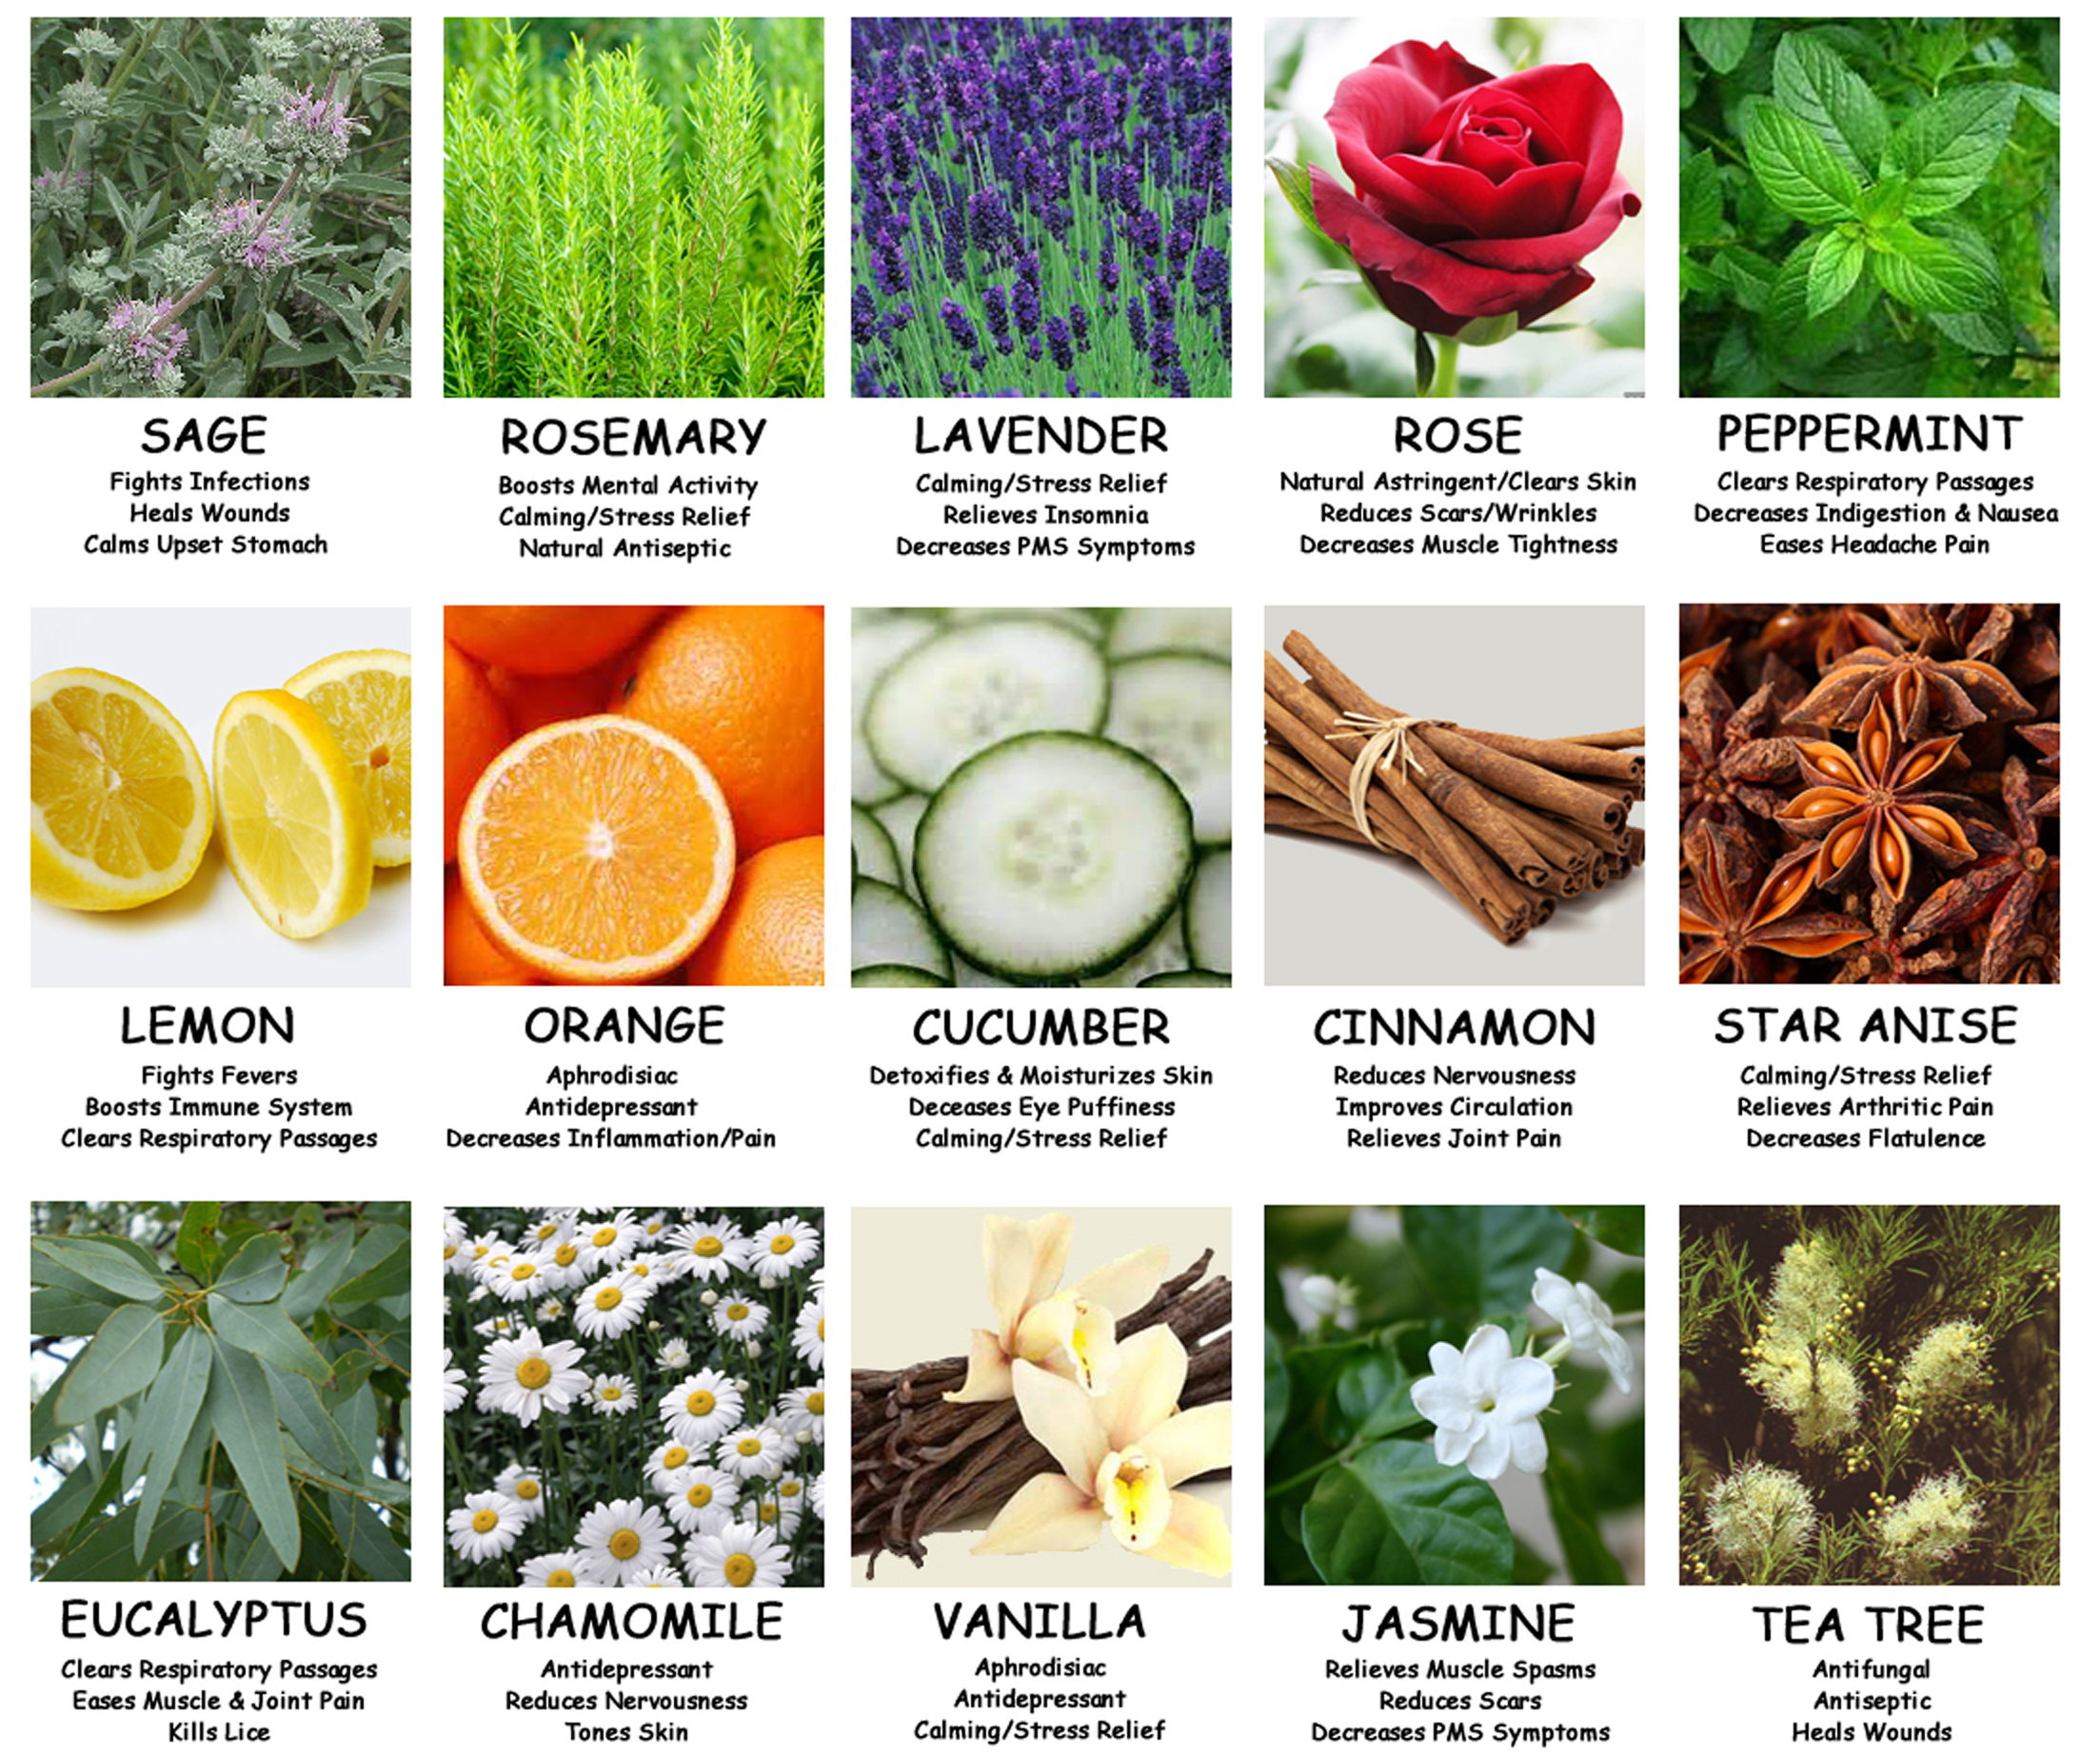
Aromatherapy Chart | Source: University Health Newsa
Pour about a quarter size amount into the bottom of each jar. Place the pitcher back in the hot water so the wax stays melted.
Place one wick in the center of each jar. Use the skewer to push down the wick and make sure it is placed properly. Allow the wax to cool for about 5 to 10 minutes until it is solid enough to place the wicks inside.
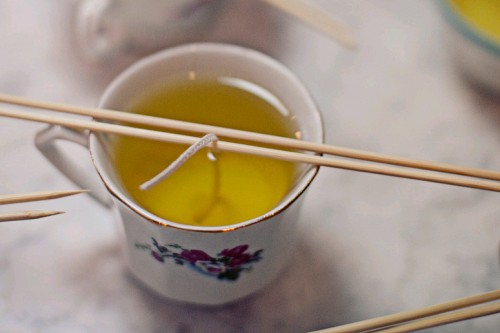
Using Wick & Skewer in Teacup | Source: ElizabethAnneDesigns
Using your bamboo skewer, wrap the top end of the wick around it and make it taut with the skewer resting atop the jar. You can even use tape to keep the skewer in place.
Tags: Furniture
September 28th, 2017 — Designer Stuff
Sometimes we just can’t sleep. It may not necessarily be a sleep disorder but we may have a lot on our minds, worried about money, anxiety over an interview the next day or our bodies hormones are just going awry. There are 3 different natural remedies you can use to help treat insomnia to relax your body and calm your mind.

Source: Snorezing
Disclaimer: Never overuse any of your herbal remedies, just like prescription medication or over the counter medication, they can have adverse side effects if not used in moderation.
Valerian Root: Valerian is also known as vandalroot or garden heliotrope. You can find it in your garden and make a tea from it or chew on it in small amounts. You can also find it in vitamin supplement form. It is used to help with insomnia and nervousness. It has proven to be an effective sedative.

Source: Herbal Extracts Plus

Source: Bouncing Bear Botanicals
Kava Kava: Kava Kava can be made into an herbal tea, found in stores as an herbal tea or can be taken in vitamin supplement form. It helps with relaxing muscles and reducing anxiety. It helps with mild insomnia as well. It is very helpful at inducing relaxation and calmness.
Melatonin: Melatonin is a natural secretion we produce in our pineal gland. It comes in supplement form and is used to cure mild to high insomnia. When overused, this particular remedy will lose its potency so take sparingly and only use when absolutely necessary. Try the other herbs first.

Pineal Gland | Source: Uplift Connect
There are many ways to help with insomnia and sleep disorders, but I found these natural remedies to be the most effective and work the best when my loved ones or I are having difficulty sleeping.
Link: sixdifferentways.com
Tags: Furniture
September 25th, 2017 — Designer Stuff
I absolutely love shrimp. It doesn’t matter whether its shrimp scampi, cooked shrimp with cocktail sauce or grilled with garlic, I adore it! But for your pickier guests and especially for the summer, a grilled garlic shrimp recipe that is easy to make can make a nice and light entree for everyone to enjoy.

Source: anniesfoodblog
What you’ll need:
- 1 lemon
- 1 lime
- Salt and pepper
- 2 cloves of garlic
- 2 tbsps olive oil
- 2 pounds raw jumbo shrimp (preferably peeeled and deveined)
- Ovenproof skillet
- Kitchen Scissors
- Kebab sticks or skewers (optional)
Firstly, if you get 2 pounds of raw jumbo shrimp and they aren’t already peeled and deveined, it may take a little extra time to do this but I can explain how:
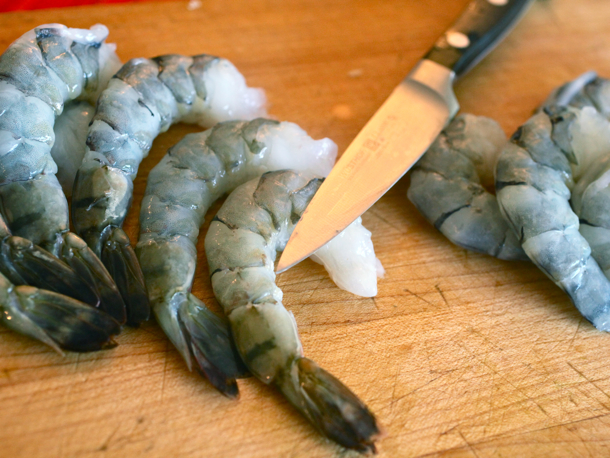
Source: Serious Eats
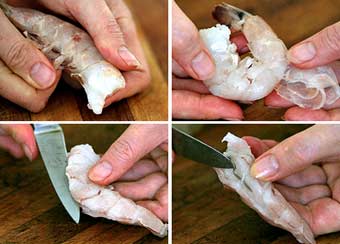
Source: Simply Recipes
Hold the shrimp with the tail and the outside curve away from you. Use kitchen scissors or a small knife and cut through the shell along the top of the shrimp. If the shrimp still have legs on then, you can simply grab a hold of the legs and peek back.
Peel back the shell but keep the tail intact. Hold your peeled shrimp under running water. Next, you’ll want to remove the vein, which is actually the shrimps digestive tract. Just scoop it with a knife or fork, its usually a brownish sometimes green color.
Next, peel your garlic cloves, press or mince them. Add the olive oil and garlic cloves to an ovenproof skillet on medium-high heat. Add shrimp and cook for about 3 – 4 minutes – make sure to turn once halfway through!
Then, cut 1 lemon in half and squeeze half of the lemon over the shrimp, give the entire dish about 10 shakes of salt and 4 twists (or shakes) of pepper.
Preheat your over to 200 degrees F and transfer your skillet to the oven to keep warm before ready to serve.

Source: Damn Delicious
You can add the garlic shrimp to a bowl or place on kebab sticks / skewers. The other half of the lemon and the lime is to be sliced for your guests to add a little extra squeeze of lemon or lime if they want and to add garnish on top of your dish.
Link: sixdifferentways.com
Tags: Furniture
September 23rd, 2017 — Designer Stuff
Aside from blogging and freelance writing, I make my own crafts, artwork and furniture. I’m going to let you guys in on some of the best tips and tricks I’ve learned along the way.

Spource: GetApp
Etsy – best for selling clothing, jewelry, accessories and health and beauty products – you can sell original artwork, vintage or collectibles, decor, refurbished furniture (there is a selling fee)
eBay – excellent for selling hard to find collectibles, artwork, vintage clothing and accessories – more competitive then Etsy as far as pricing and shipping is concerned (there is a selling fee)
Amazon – perfect for wholesalers and if you have an online store you already sell on or if you have open box products (there is a selling fee)
LetGo or OfferUp – Great for local sellers and buyers, post your stuff, typically things you may give away to a thrift store or have a yard sale with, and have people come right to your door or deliver it to them! (No selling fee)
Helpful Tips to Remember:
- Taking good photos is key – Do not have blurry photos, make sure to get every angle of the product, have a white, plain or neutral background and when selling decor or furniture (if possible) see if you can make a lifestyle image with it (set the scene)

Source: InstanteStore
- Having accurate and proper dimensions, weight (for when you need to calculate shipping)
- Good product description – good grammar and punctuation, be professional and keywords, SEO works for individual sites, pages and products
- if you are selling artwork (whether it be your original or not) give a good and accurate history of the artist and the artwork – period it was made, signed or not, type of art (cubism, portrait, resembling Monet, etc. )
- Make sure you figure out cost for shipping (dimensions, weight and factor in distance) and cost per post and any other fees selling sites may charge to factor it into your pricing
- Pay attention to competitors pricing but don’t undervalue your product just because someone else is

Source: Loanpride
These are the sites I’ve used so far to discover how well my handmade and handcrafted products and vintage, antique or thrift store finds have made the most money from in the least amount of time. If you have any practices or tips you’d like to share, feel free to comment below!
Hope this helps and good luck!
Link: sixdifferentways.com
September 20th, 2017 — Designer Stuff
Firstly, being a good blogger for other blogs can be a little challenging but if you start by creating your own blog, it can be an easier way to get you started. All you have to do is start a blog about anything you are interested in. Whether it be interior design, crafts, recipes, music, sports, or even documenting your pregnancy! You can write about pretty much anything, after all – it is your blog!

Source: Nikola Mihailovic | SEO Expert
Next, use an easy content management system (CMS) like WordPress, for example. There is a difference between WordPress.com and WordPress.org, if you a part of .org, you will want to purchase a domain and find a reliable hosting server.
Then, download the WordPress or whichever CMS you choose to use. If you go through WordPress.com, you are using their hosting server usually with WordPress in front of a blog name like www.wordpress.com/your-blog-name. When you get a little more serious about your blog you will want to purchase a domain name and transfer it over or go completely through WordPress or chosen CMS / Server site.

Source: Entrepreneur
I use Dreamhost as my serve, I’ve found it to have the least amount of issues and reliable services, but there are countless other sources. I’d advise to read reviews and customer testimonials to find what meets your needs best. From there, if you don’t have programming experience, you can pick from a variety of pre-made templates to begin designing your blog or you can pay a graphic designer / programmer to create one for you. Better yet, you can check out some YouTube tutorials and create your own!

Source: DesignPress Blogger Templates
Come up with a catchy title for your blog, something that relates to what you write about and something easy to remember – some of the easiest to remember and most high ranking blogs are one to three words at most.
Now you can start your first blog post! Let the writing flow, pay attention to keywords and if you want to accredit other blogs or use photos ask permission or at the very least source the photo which means giving credit in the caption.

Source: Pinterest / Dllconsulting.com
Another helpful tip: if you accredit another blog or site on your post, you are actually helping them through back-links and if your blog gets enough attention, they may do a link exchange with you, they may give you free products or even ask to advertise on your blog which means exposure, promotion, higher ranking on search engines, free stuff and cash money!
Once you start receiving compensation for your blog and posting daily, you will want to fill out a form to take out your own taxes for when tax season rolls around.

Source: Blog Tyrant
If your blog becomes successful you may start receiving offers from other blogs or companies or websites who want to purchase your blog.
Don’t undervalue yourself. Your knowledge, wisdom and information is important! If and when they make an offer and if money isn’t your end game, who knows – your blog could lead to many more opportunities that could build a dream future less fleeting than cash. So always be yourself and start blogging!
Go here to read the rest: sixdifferentways.com
Tags: Modern Furniture


