December 21st, 2017 — Designer Stuff
5 Days til’ Christmas Countdown: Create your own christmas potpourri to give your home that warm and cozy aroma throughout the holiday season. You can make this whenever you are having guests, especially if you are hosting christmas eve or christmas or turn into sachets to give as gifts. Below are two ways to create a wonderful christmas potpourri.

What You’ll Need:
- dried rose petals
- cinnamon sticks
- star anise
- whole cloves or clove essential oil
- cinnamon essential oil
- rose essential oil
- orange essential oil
- Grapeseed oil
- eucalyptus oil (optional)
If you want to make potpourri jars or sachets – Add dried rose petals, cinnamon sticks, cloves and star anise in an airtight or hermetically sealed container.

Mix together a few tbsps of grapeseed oil, a few drops of rose, orange, cinnamon and clove essential oil. Clove and cinnamon essential oil is very strong so add less drops of these then the rose or orange. Mix together – try to use something wooden, not metal, a wooden chopstick would work well, just to blend them together. Pour the oil over the dry goods in the container.
Close the container and shake together. If you want to make sure the lid of the container is sealed very tightly, you can place the lid on the container and run under very hot water but isn’t imperative for the fermenting of potpourri. Place the container on a windowsill that receives sunlight so the heat from the sun can allow the potpourri to ferment nicely. Allow to ferment for 14 days or more, you can create individual containers to give as gifts or you can add the potpourri mixture to sachets to give to others.

If you want to make your house smell like christmas potpourri for the day – double your ingredients, add all of your ingredients to a pot with enough water to just barely cover them and allow to simmer all day. I recommend adding a few drops of eucalyptus oil as this is very beneficial for stuffy noses and sore throats, just in case any of your guests may have a little cold or a case of the sniffles.
View post: sixdifferentways.com
December 18th, 2017 — Designer Stuff
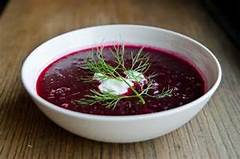
7 Days til’ Christmas Countdown: A ultra healthy and super tasty soup commonly eaten in Slavic countries such as the Ukraine, Russia, Poland and Lithuania is Borscht, made using beets and a few other ingredients – it can be eaten both cold and hot – in the Ukrainian tradition, we have our borscht cold, sometimes we eat it with a dab of sour cream and it is the first dish served for Christmas eve dinner.
What You’ll Need:
- 3 – 4 large raw beets
- 1 medium onion (diced)
- 2 large potato
- 2 – 3 carrots
- 1 head of cabbage
- white vinegar
- coarse ground black pepper
- sea salt
- low sodium vegetable broth
- bay leaves
- dill
- vegetable or canola oil
- sour cream
Add beets and 10 cups of water to a large pot and bring to a boil. Boil for about 1 hour, check to see if the beets are ready – you can test by taking one out (don’t burn yourself, don’t just grab with your bare hands, use a fork and take from the pot, if it cuts easily with a knife then they are tender enough and ready to use). Save the water. Allow the beets to cool, peel and slice into strips. You can use a mandoline slicer for this or simply use a cutting knife. While the beets are cooling, peel the potatoes, dice and add to the same water the beets boiled in. Peel the carrots and add to the same water. Boil for 8 minutes. Shred half of the cabbage and add to the water.

Boil the potatoes, carrots and cabbage for another 5 – 6 minutes. Remove the carrots and slice into matchstick size strips. Sautee the diced onion in a pan with the vegetable or canola oil. When the onion becomes a light golden brown color, add the carrot and 2 tbsps of white vinegar. Mix together.
Chop a bushel of dill, 1 – 1 1/2 cups is fine. Add 6 cups of vegetable broth to the pot. Next, combine beets, potatoes, shredded carrot and onion mixture, dill, bay leaves, sea salt and coarse ground black pepper to the pot. Stir together and allow the soup to simmer covered with all the ingredients for another 20 to 30 minutes.
Make sure the soup is at a very low simmer, you want the flavor and juices of the

vegetables to seep slowly and gently into the broth without the water evaporating. Remove from the heat and allow the soup to steep and cool. Place in the fridge overnight. Soup often times tastes better the day after because the vegetables, seasoning and broth have a chance of infusing one another and blending better.
Being that this is a cold soup anyway, making it the day before and putting it in the fridge overnight makes the most sense. Once you are ready to serve, you can use a strainer lined with a cheesecloth for only the broth (a traditional way this dish is served) or you can simply add the soup with all the vegetables. Whichever way you or your guests prefer – it is a matter of taste and preference. You can add a dollop of sour cream and garnish with a sprig of dill in the center of each serving bowl.
December 16th, 2017 — Designer Stuff
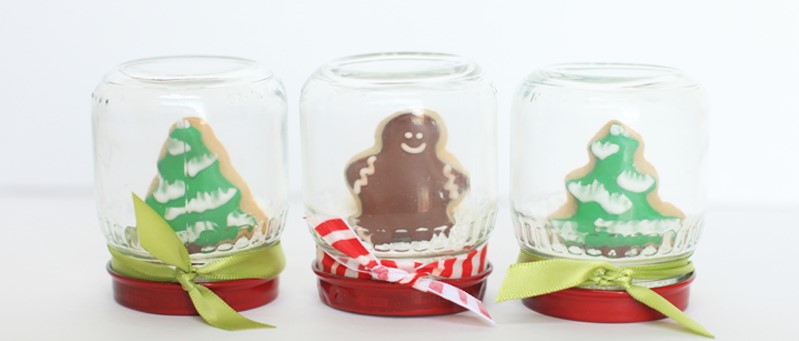
9 Days til’ Christmas Countdown: Edible snowglobes make super cute decorations, awesome gifts or party favors during the winter holidays. They work just like real snow globes but the best part is you can eat the stuff inside!
What you’ll need:
- Holiday sugar cookie cutouts – in different holiday shapes, like christmas trees, gingerbread men, stockings
- Round sugar cookies
- icing
- royal icing
- gel
- paint brush
- edible glitter
- mason jars (size depends on size of cookie)

Bake your holiday shaped and round sugar cookies according to the instructions. Add icing to your holiday shaped sugar cookies first and allow to dry. Add a thick layer of royal icing to your round sugar cookies – these will serve as your holiday shaped sugar cookie stand. Stick your holiday cookies into the icing firmly and allow to dry.
Gently brush a clear gel over your cookie creations to serve as a sticky base for the edible glitter to stick. Sprinkle each cookie with edible glitter. Using the inside of the lid of the mason jar, use a dab of royal icing and stick your cookie creation on top to hold it in place, allow to dry.
December 14th, 2017 — Designer Stuff
12 Days til’ Christmas Countdown: A really wonderful gift idea that is personalized and budget friendly is a personalized gift idea. This is great for family members, couples or to give to good friends!
Most office supply stores will have the resources for you to print out your personalized calendar or you can do it from the comfort of your home online and it is fairly simple to do! Gather your favorite photos and memories of you and your loved one and choose a photograph for each month of the year. You can put a spin on this and make it a personal to that individual solely.

For example, if your friend really loves breakfast foods, you can make each month a different breakfast food! A silly idea but maybe your friend has a goofy sense of humor!
Another idea is if they are an artist or really love a particular artist or art style, you can take nice photos of their artwork and find nice photos of their favorite style of artwork and add one for each month. This can show you admire their artwork and you support them every day and every month of the year.
Know someone working towards a goal this year? You can make each month a motivating quote or a visual reminder inspiring them to achieve their goal.
This idea is wonderful because it is personal to the special someone you are making it for and it is a fun and creative activity for you as well!
Read more from the original source: sixdifferentways.com
December 12th, 2017 — Designer Stuff
13 Days til’ Christmas Countdown: Spread the holiday cheer this year by making christmas ornaments with positive quotes, affirmations and inspirational compliments to decorate your own tree and to give to family and friends!

What you’ll need:
- Glitter
- shiny confetti
- white paper
- multicolored construction paper (optional)
- scissors
- clear round ornaments
Using your scissors, cut white paper into strips that are wide enough to write on but short enough to fit snuggly inside of your ornament. You can also add a colored piece of construction paper behind the white paper for extra pizazz!
On each strip think of optimistic, happy and kind quotes or words that you or someone else would like to hear. For example, I received one from a friend of mine that said “You are wildly beautiful.” A few others you could use are “Your smile makes the whole room light up,” or “You have a big heart and a magical soul,” or “You are a loving and empowered person.”
Write one of these on each strip of paper. Open the clear ornaments and add glitter and confetti, then place one quote in each ornament. Close the tops and shake them up!

Very gently add these ornaments to a large bag and have each of your friends and family members select one or you can hang them on your christmas tree and let them chose their own!
Read this article: sixdifferentways.com
December 11th, 2017 — Designer Stuff
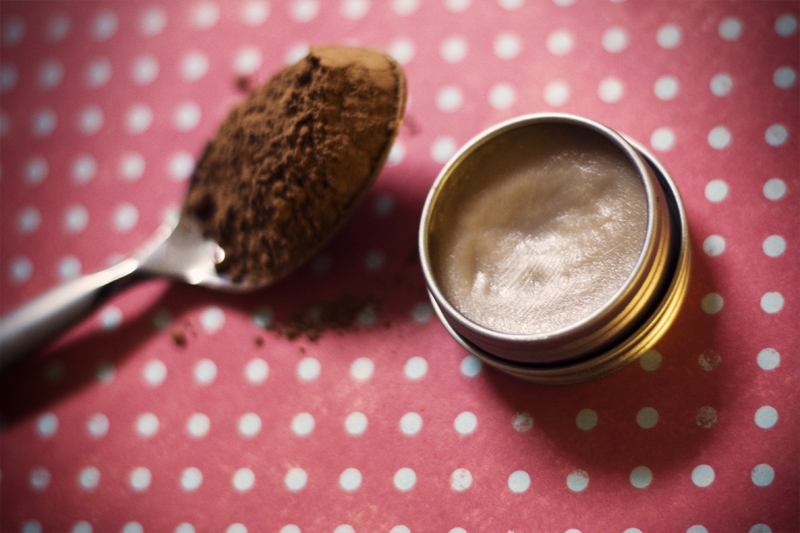
14 Days til’ Christmas Countdown: A great gift, a chapped lip cure and tasty kissable treat for your lips, Chocolate Peppermint Kiss Tinted Lip Balm is a perfect christmas and holiday activity. You can make your own at home using a few simple ingredients!
What You’ll Need:
- White Beeswax Pellets
- Cocoa Powder
- Sweet Almond Oil
- Coconut Oil
- Peppermint Essential Oil
- Small Plastic Containers or Tins (I used a bunch of those small altoid tins)
Using a double boiler or microwave, melt the white beeswax pellets, be careful not to overheat them if you are using a lot especially in the microwave. You will want to put them in 40 second intervals and stir each time you take them out. Add cocoa powder to the melted beeswax and stir until smooth. The cocoa powder gives a light tint to your lips when applied.
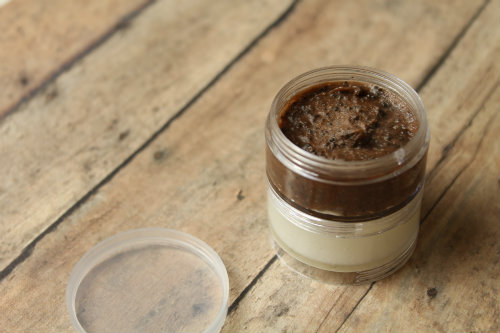
Add equal parts sweet almond oil and coconut oil to the mixture. Add 20 – 30 drops of peppermint essential oil. Mix altogether and then using a funnel gently pour the mixture into individually portioned containers.
I didn’t give exact measurements because I rarely do single serving lip balms. Done in batches, you can experiment with the measurements but you will want your lip balm to not be too thick or very liquidy, however you will want the mixture to pour easily into each container.
After you have poured the mixture, allow them to firm overnight. Make sure they are stored in a cool place so as not to melt just like you would any store bought lip balm or chapstick.
Not only is this lip balm great for curing chapped lips but it is natural, edible and tasty too!
December 10th, 2017 — Designer Stuff
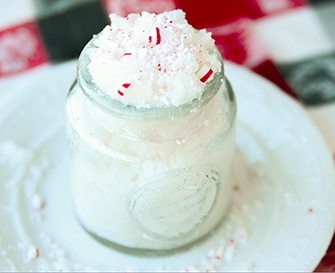
15 Days til’ Christmas Countdown: Colder weather means chapped lips and dry skin, you can make your own peppermint body and facial scrub at home with a few simple steps.
What You’ll Need:
- granulated sugar
- peppermint essential oil
- grapeseed oil or jojoba oil
- 80% isopropyl rubbing alcohol
- 6 or 8 oz mason or glass jars
- Note: I don’t recommend using coconut oil as the smell of the coconut may overpower the smell of the peppermint.
December 9th, 2017 — Designer Stuff
16 Days til’ Christmas Countdown: Looking to bring something sweet to holiday party or baking cookies as gift this year? A festive and easy to make cookie recipe are peppermint kiss christmas sugar cookies!

What You’ll need:
- 1 cup room-temperature butter
- 1 bag of candy cane Hershey kisses
- 1/4 cup of finely crushed peppermint candies (about 10 pieces)
- 2 cups flour
- 1/2 cup sugar
- 1/4 tsp salt
- 1/2 cup sugar for rolling the dough in
Preheat oven to 350 degrees. In a bowl, mix together the butter and peppermint extract. Beat in the crushed peppermint candies. Gently mix in a few pieces of the candy cane Hersey kisses if you want.
Add the flour, 1/2 cup sugar, and salt; stir well. Chill for 30-60 minutes. The dough should be soft but firm enough to mold and shape into 1 inch balls, then roll in sugar.
Place on a lightly greased baking sheet spaced evenly a part as they will spread out as they bake. Bake for about 12 minutes. Immediately after removing them from the oven, press a kiss in the middle of each cookie. Allow your candy cane cookie creations to cool for several minutes on the pan before removing to cooling racks!
Original post: sixdifferentways.com
December 8th, 2017 — Designer Stuff
18 Days til’ Christmas Countdown: Want to create an amazing musical light show this year using your christmas lights? You can do this fairly easy in a few simple steps.
You’ll want to purchase a light control box with an audio-in port (and synchronization programming in case you want to use your own music at another time) and a wireless FM radio transmitter in order to sync your christmas lights to a broadcast. The idea is when someone tunes into your channel, the light show seen will be in sync with the music being played on their radio.
- Decorate your house with christmas lights in an assortment of colors, different patterns or in any display you find attractive, make sure all of your lights are attached to one another
- Plug your christmas lights into the power outlet on the light control box. You can also use a power strip with a surge protector (for larger displays) and plug this into the power outlet on the light control box.
- Plug the light control box into a wall outlet, turn the light control box switch on
- Plug your wireless FM transmitter’s audio connector into the “Audio In” port on the light control box. Switch on the FM transmitter’s power switch. There should be multiple position switch or a toggle switch for the audio options on the light control box.
- Set your FM transmitter frequency with the radio frequency you wish to use. Stations in the lower numbers work best. Match the radio’s FM frequency with the FM transmitter’s frequency. Check the instructions on your device for assistance with tuning.
- Test it for yourself!
Sometimes it can be a little challenging to match the frequencies perfectly so the quality of the sound may come in a little fuzzy or distorted but several factors come into play such as those tuning in, the device being used or the surrounding environment. Some solutions may be removing obstructions and testing different spots to place the equipment. Also using the right equipment and finding the right channel plus a little time and patience you can create an amazing light show that will dazzle the whole neighborhood!
December 6th, 2017 — Designer Stuff
21 Days til’ Christmas Countdown:
Most families that celebrate Christmas have their traditional Christmas dinner each year. We know Uncle Pete is bringing the baked ham, Mom is bringing the casserole, Grandma is making the creamy mushroom soup, aunt Susie is bringing her famous snickerdoodle cookies for dessert and you’ll be making whatever delicious dish you make every year. We look forward to these dishes every year and there is no reason they can’t still be a part of the menu, but a great way to add variety to the meal and explore making and eating different foods from around the world is through a little game called Multicultural Christmas. It’s really quite simple.

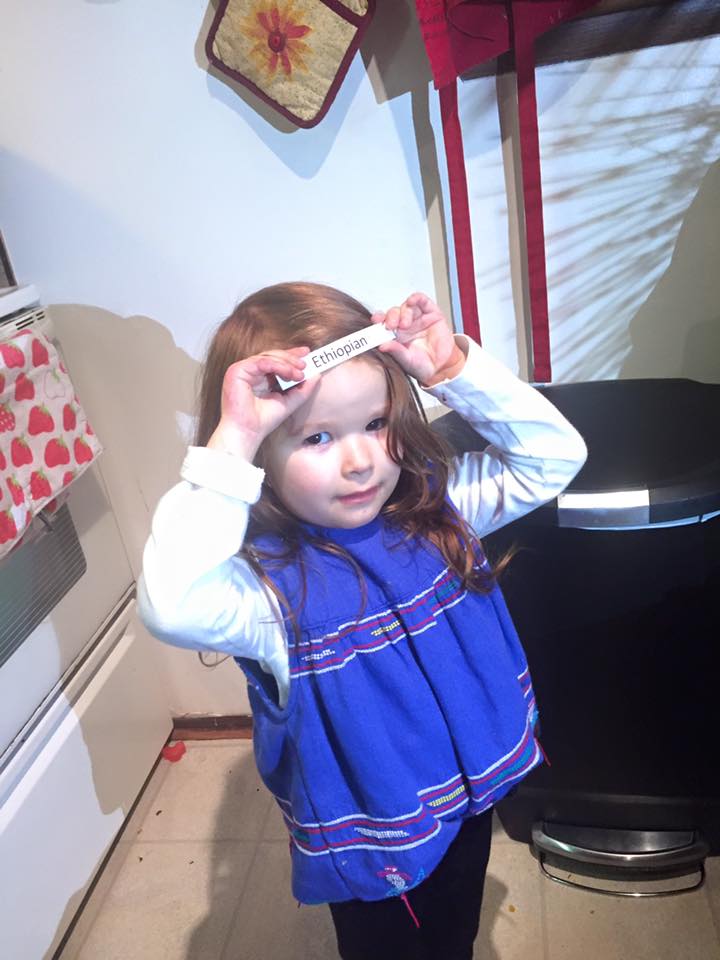
Multicultural Christmas Game: On individual folded pieces of paper write the name of a different country specifically of countries whose cuisine sparks your curious taste buds. Next, add the folded paper to a basket, bowl or hat and have each family member pick one out. Once every one has chosen, each person can read aloud the country they selected or you guys can choose to keep it a secret until Christmas dinner. Whichever country you won, make one or two dishes indigenous to that particular culture or region.
